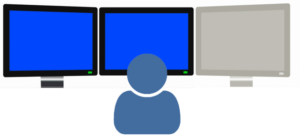
Sometimes it could be very helpfully to have a Virtual Monitor, but please note not to be confused with a Virtual Desktop, i.e. a monitor which is recognized by the system as physical device. The big advantage of a Virtual Monitor is that it has a valid canvas which is available despite it is not visible. In contrast to it, a Virtual Desktop has no valid canvas as long it is not visible. So we can use the Virtual Monitor as like as a physical device with only one difference, we cannot see it, we cannot touch it. What can we do with such a Virtual Display? Here are two examples :
(1) You want test the behaviour of own applications, e.g. on a 4k Monitor despite there is not a physical 4k Monitor connected. You can do this task by a Virtual Monitor because it offers all resolutions which are available in the current system, dependent on the installed graphic.
(2) You have to continuously observe one or more application windows, e.g. windows of a monitoring solutions, and maybe you want share the screen to remote locations or other devices – then you can use the tool CaptShare from dtvTools. By using this tool you can capture and share the screen of a Virtual Monitor and your physical Monitor(s) are available completely for your daily work.
For Windows 7 / 8.1 it is quite easy to create a Virtual Monitor:
Unfortunately, the solution as described for Windows 7 – see on left – is not longer available for Windows 10, so we need another solution. Thanks a driver provided for free by Amyuni Technologies Inc. we can realize a Virtual Monitor also in Windows 10 – Thank for this great work! This driver allows to create up to 4 Virtual Monitors on your system.
After successful installation the question is now: How can I identify and access my new Virtual Display on my system?
E.g. on Windows 10 right click on the desktop and click ‘Display settings’ then you will get a dialog as shown on right. The Virtual Monitor is identified by index ‘3’. The colour profile is empty, this is the hint that is the Virtual Monitor. You can setup now the desired resolution, the scaling and further properties.
You can experiment with options ‘Multiple Displays’ but it is not a good idea to set ‘Make this my main display’ for the Virtual Monitor, it will not work as expected. But how can I control the Virtual Monitor on my local system and, above all, how can I see what is happening on this monitor. So there are two possibilities, the local control or the remote control by using further tools.
On your local system you need a tool which is able to move application windows from a physical monitor to the Virtual Monitor and vice versa and furthermore, to move, resize or close windows on there. The Monitor-Manager application – MonMan – a little free tool provided by decontev, will do these tasks.
In order to monitor your Virtual Display you have to capture the screen and have to display these captures on a physical monitor of your system. For that task you can use the free tool CaptShare from dtvTools. CaptShare is able to create a HTTP Live Stream (HLS) or snapshot sequences from the screen of your Virtual Monitor. HLS can be played back by free tools, e.g. SAMplayer from dtvTools or VLC media player.
Of course, the Virtual Monitor can be controlled via remote access, but you need another machine.
Remote Desktop (Windows)
Access via Remote Desktop does not work, because the Virtual Monitor will not be recognized as an additional device.
AnyDesk, TeamViewer & Co
The access of a Virtual Monitor via remote desktop application like TeamViewer or AnyDesk works perfectly, so that you control your Virtual Monitor very comfortable. But note, there are several disadvantages:
– you need a second machine
– you have to install a remote desktop application on both machines
– this SW is not free for professional usage or feature reduced for private usage